Bringing Photographers Closer to Their Natural World
|
|
|
Multiple Exposure Part 2 - Abstracts Lonnie Brock
There are two basic types of multiple exposures: 1. Repeated exposures that combine different subject matter and that type was discussed in Part 1 of this article. 2. Repeated exposures of the same subject matter that tend to produce more impressionistic results. Whichever approach we take, we still calculate our exposures as was discussed in Part 1 of the Multiple Exposure articles. You can reset the EI (exposure index, or more often inappropriately referred to as ISO - ISO is actually only correct when referring to the rating of the film, not when referring to a re-rating set by the photographer) of the film or underexpose each frame based on the formula given in Part 1. We will discuss two basic approaches to multiple exposures of the same image here: 1. We can try to move the camera up or down, left to right., right to left, or obliquely, while exposing the various frames of a multiple exposure of the same item. This approach is very effective when a line or series of lines is present in the original composition and we take account of the orientation and direction of the lines. We must be aware that a very small movement has a large impact in this approach and try not to overdo the sliding of the frame.
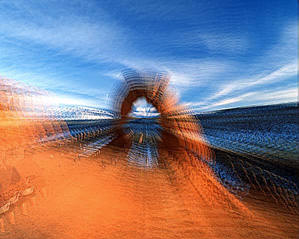
2. For a dramatic effect, we can zoom our lenses from exposure to exposure. This is slightly like zooming our lenses during a long exposure, except that it has distinct stopping points along the zoom. The easiest approach is to choose a fixed point that is in the center of the zoom, like the image of Delicate Arch at the beginning of this article. If we always zoom from wide to narrower, we can also control the edges of the frame and assure that nothing unexpected will creep into the image. The zoom range, say 107 mm for a 28 to 135 zoom, can be divided by the number of exposures we calculate will be needed to give us a proper exposure and that increment will be the number of mm we zoom between each frame.
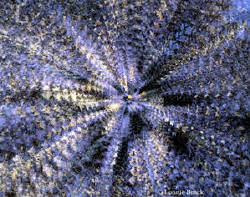
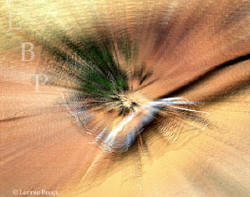
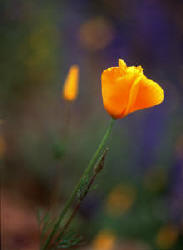
The more complicated the subject, like the holly plant on the left, the fewer frames needed to give us an abstract effect. The simple manzanita plant lying on slick rock (see Steve Alterman image of this manzanita without any multiple exposure) may require us to use more frames just to make the image a bit more abstract. Can we take this a bit further? Of course, just like anything else in photography, we can keep using our creative powers to change the natural scenes. Although all the images and discussion here assume we will use a tripod, we could hand hold the camera and our natural movement of our hands would cause some of the effects in multiple exposures we are seeing here, maybe with less symmetry. Our images are also all centered, but we could rotate the camera around some axis that is not in the center - a much more difficult proposition if we want to keep the point of interest in the same place throughout (and that is likely necessary for sanity's sake). One step farther would take us to rotating the camera while we zoom the lens, with the point of interest being off center. Try these and send some of your results - it will be a lot of fun but maybe a bit frustrating to start. Below are a couple images made with the approaches noted in Part 1. The first is a single poppy made with the first exposure being in focus and the second exposure being ever-so-slightly out of focus. The second is a famous barn double exposed with a board from the barn, with the board underexposed by approximately 1.5 stops and the barn only underexposed by 1/2 stop. Obviously, the barn becomes more prominent in this image and the image illustrates how we can manipulate the different frames to make whatever we want to be prominent.
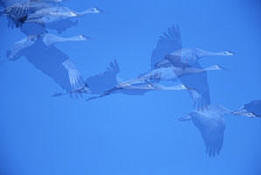
The next image is some of the fundamentals noted here applied while panning a few sandhill cranes in flight. The effect in this case is somewhat ghostly,
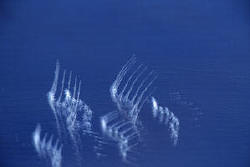
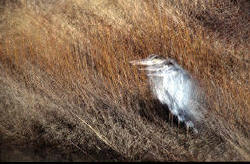
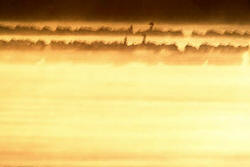
So, which of these images are the most correct? Simply, none are more correct than others. Creativity allows us to make whatever image we desire and only experimentation will give us a knowledge base from which to work that allows us to pre-visualize our results. Having fun making the images is the most important detail - not the gear or the results. The more we allow our minds to run free, the freer our spirits and our images will be. EXPOSURES of ATTACHED IMAGES (in order of appearance) Delicate Arch Zoom - 8 exposures Frosted Stems in Ice - 8 exposures Heron in Grasses - 4 exposures Backlit Grasses - 8 exposures plus mirror Rows of Geese at Dawn - 4 exposures Holly Zoom - 4 exposures Manzanita Zoom - 9 exposures Single Poppy - 2 exposures, one in focus, one very slightly out of focus Double Moulton - 2 exposures, with varying emphasis as noted Cranes in Flight - 4 exposures hand held |
|
To register online on a secure registration
form, or to print out a
registration form, go to
Registration, |